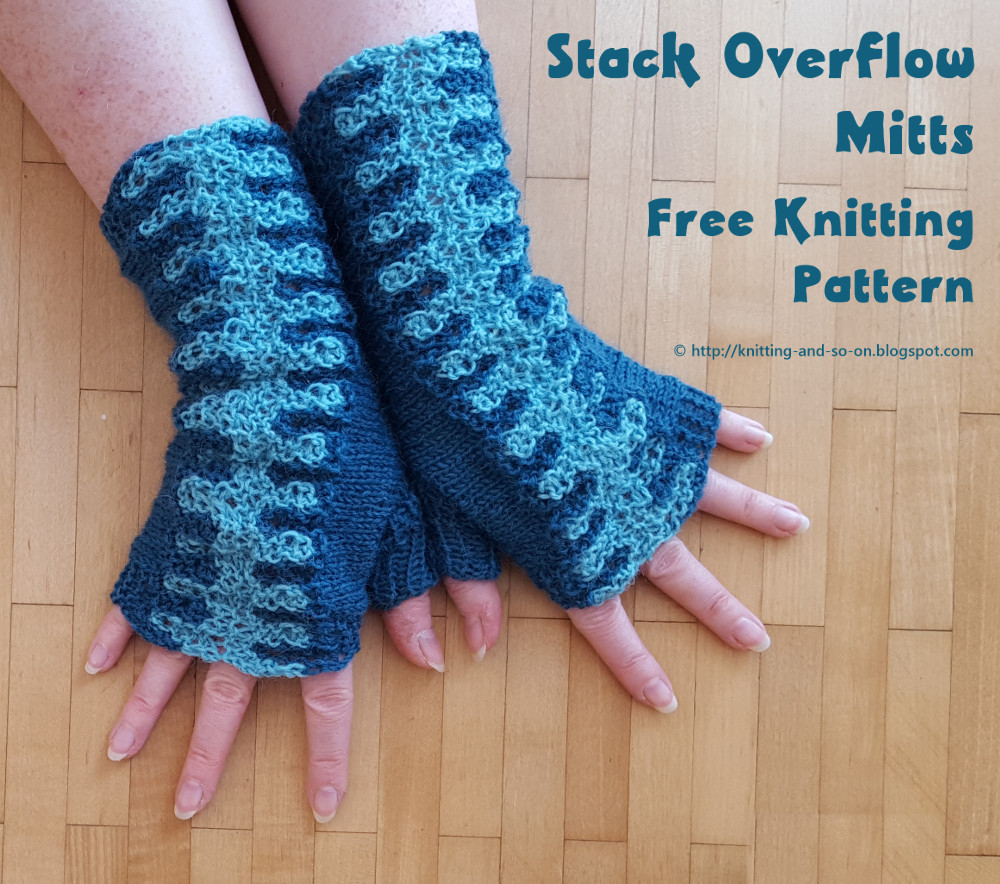
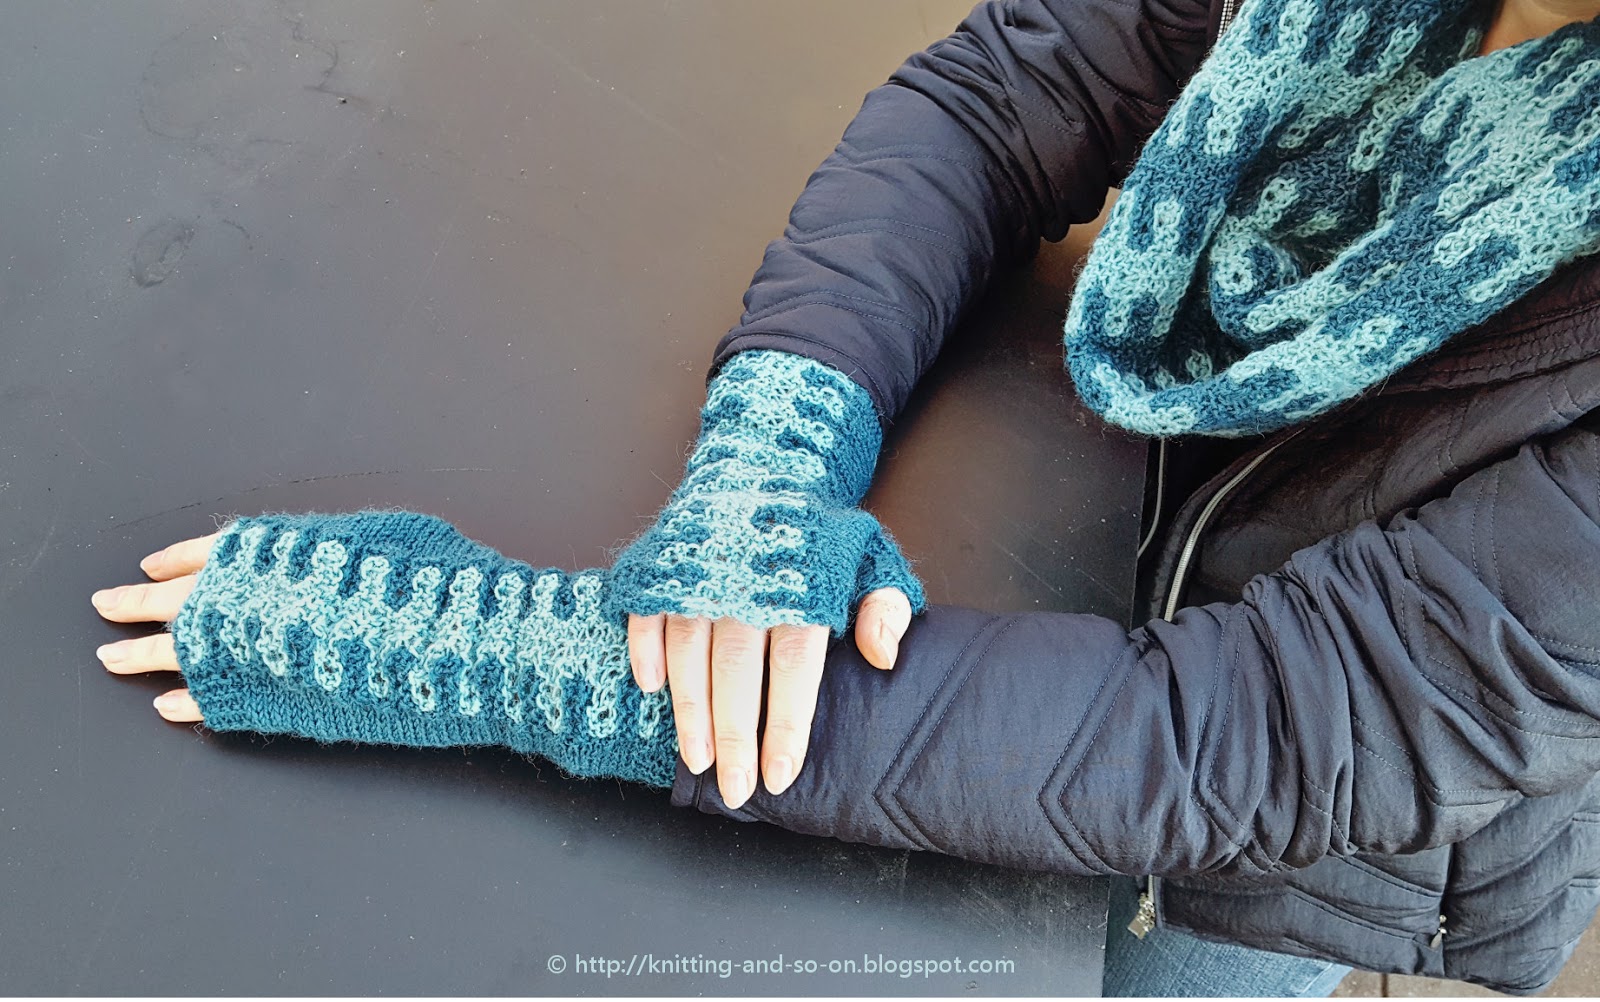
So I am quite proud that this time I actually managed to knit a matching set - and not only in terms of the yarn I used, but also as concerns the stitch technique. In March I published a pattern for a cowl with stacked stitches - called the Stack Overflow Cowl. Even though it's made from quite cheap sock yarn, I love to wear it. And since there was yarn left, I decided to design a pair of fingerless gloves with stacked stitches as a decorative element; the construction is based on my Strata Fingerless Gloves (published last year).

This work by Knitting and so on is licensed under a Creative Commons Attribution-NonCommercial-ShareAlike 4.0 International License.

Materials
- a total of about 35 grams of fingering weight yarn in two colors - about 25 grams of your Main Color and 10 grams of your Contrast Color.
- 3.25mm needles (circulars or dpns for the thumb and straights or circulars for the body part)
- scrap yarn for the provisional CO
- a crochet hook for provisional CO
- tapestry needle to graft and to weave in ends
Special Stitches and Techniques
- kyok = k1, yo, k1 into the same stitch
- SB = slip back the number of sts to the left hand needle
- inc1-9 = [kyok, SB2] 3 times, kyok, k3
This is called stacked increase. A YouTube video that shows how to make stacked increases can be found on So, I make stuff's YouTube channel - dec9-1 = k3, s1, k2tog, psso, SB1, k2tog, pass next st over, SB1 2 times, k2tog, pass next st over. This is called stacked decrease. Also from So, I make stuff's YouTube channel here's a video that shows how to do stacked decreases.
- BBO = backwards bind off: insert the left hand needle into the last 2 sts and knit together, alternatively you can turn your work: do a p2tog and slip the last st back on the left hand needle
- Provisional CO: My favorite method for a provision CO is the crochet provisional CO - it is shown in this Youtube video by New Stitch a Day.
- Short Rows with Wrap and Turn (w+t): In this pattern short rows are used to shape the mitt, i.e. to make it a bit wider at the bottom edge. The pattern is written with "wrap and turn"-short rows (see this YouTube Video by Very Pink Knits and this YouTube Video to show how to pick up wraps on the purl side by knitfreedom.com) - however, any method that you like works as well.
- Grafting Stockinette Stitch / Kitchener Stitch: A technique to get an invisible (knitted) seam - this technique is shown in this YouTube Video by knittinghelp.com.
The schematic below shows the construction of these mitts. The mitts are started at the thumb (1) which is knitted in the round. Then an increasing oval shape is knitted (2) - half of the stitches of the oval are put on a stitch holder to be used later. At one end of the oval a provisional CO is added, to give length to the shaft of the mitts.
The main body part (3) is knitted flat - first a few stockinette rows - followed by a stacked stitch pattern to decorate the back of your hand and then stockinette stitch again to cover the palm. The last row is attached to the provisional CO and the stitches from the stitch holder by means of a three needle BO.
Photos of the mitt in construction can be found in this blogpost (the pattern for Strata Fingerless Gloves).

Gauge / Measurements
Since the pattern uses different stitches on the back and palm side of the mitts, they are slightly lopsided. The finished mitts measure 18 cm in length on the palm side - and 21 cm on the back of the hands. They measure about 19 cm in circumference at the wrist end, and about 17 cm at the top end. However, the width (circumference) can easily be adapted to fit your hand size.
When knitting in stockinette stitch 12 sts equalled 5 cm in width and 16 rows equalled 5 cm in height.
Thumb
With your Main Color CO18
Rounds 1-10: *p1 k1 p1, repeat from *
Round 11: *p1 k1 p1 mk1, repeat from *
Rounds 12-15: *p1 k1, repeat from *
In row 15 either place two markers (one at the beginning of the round - the other at the middle of the row (i.e. after 12 sts)) or use the magic loop technique and distribute the stitches evenly on the front and back needle (12 sts each).
Rounds 16 and 17: * kfb, k to last stitch of this needle (or last stitch before marker), kfb, repeat from *
Rounds 18 to 21: *kfb, kfb, k to last 2 sts of this needle (or last 2 sts before marker), kfb, kfb, repeat from *
After round 21 you should have a total of 64 sts on your needles - these stitches now form an oval shape. For the body part only one side of this oval will be used.
Body
Row 0 (RS): kfb, knit to last stitch on this needle (or last stitch before marker), kfb - do a provisional CO of 15 new stitches on a third needle - then continue knitting these new sts in row 0. If you want to customize your mitts to have a shorter or longer shaft, you can adjust them here by provisionally casting on more or less stitches - just make sure that the total number of stitches (half of the thumb stitches plus the provisional CO) is a multiple of 4 plus 3. E.g., half of the thumb stitches are 32. 32 + 15 (pCO) = 47 - and 47 = 11x4 + 3.
Put the rest of the stitches on scrap yarn or on a stitch holder
First some "neutral rows" to place the stacked stitches on the back of your hands. These neutral rows are basically all stockinette - except for some garter sts at the edges to prevent rolling at the sides.
Row 1 (WS): k5, p to last 5 sts, k5
Row 2 (RS): k all
Row 3 (WS): k5, p10, w+t
Row 4 (RS): k all
(Rows 3 and 4 are short rows added to make the wrist end of the mitts wider)
Repeat rows 1 and 2 twice more.
Now start the stacked stitches sequence:
Stacked Row 1 (WS): k all
Stacked Row 2 (RS): k1 * inc1-9, k3 repeat from * until there are only two stitches stitch left, inc1-9, k1
Stacked Row 3 (WS): * k2tog k2 kfb k1 kfb k2 ssk k1 repeat from * until there are only 11 sts left, k2tog k2 kfb k1 kfb k2 ssk
Change to Contrast Color
Stacked Row 4 (RS) = Stacked Row 3
Stacked Row 5 (WS) = Stacked Row 3
Stacked Row 6 (RS): BO4 (and carry up yarn from other color), k2, * dec9-1, k3 repeat from * until there are only 4 sts left, BBO4
Stacked Row 7 (WS): k all
Stacked Row 8 (RS): k1 * inc1-9, k3 repeat from * until there are only two stitches stitch left, inc1-9, k1
Stacked Row 9 (WS): * k2tog k2 kfb k1 kfb k2 ssk k1 repeat from * until there are only 11 sts left, k2tog k2 kfb k1 kfb k2 ssk
Change back to Main Color
Stacked Row 10 (RS) = Stacked Row 3
Stacked Row 11 (WS) = Stacked Row 3
Stacked Row 12 (RS): BO4 (and carry up yarn from other color), k2, * dec9-1, k3 repeat from * until there are only 4 sts left, BBO4
Now continue with neutral rows:
Row 1 (WS): k5, p to last 5 sts, k5
Row 2 (RS): k all
Repeat rows 1 and 2 three times more, then knit some short rows at the wrist end.
Row 9 (WS): k5, p10, w+t
Row 10 (RS): k all
Row 11 = Row 1
Row 12 = Row 2
Repeat these rows until the glove fits around your hands.
Now prepare for joining the sides together with a three-needle bind-off.
Put the stitches from your scrap yarn/stitch holder on your 2nd needle as well as the stitches of the provsional CO.
After you have picked up the stitches from the scrap yarn and your provisional CO, you'll notice two gaps around the thumb (one on top of the thumb, the other at the transition to the shaft. To avoid holes in the finished piece you'll have to pick up a stitch from these gaps and put them on the needle. To do this you need to transfer the stitches to a new needle - and when you reach the gap, pick up the the horizontal piece of yarn between the two stitches with your left needle, and twist it (as in a mk1-sts). Now you have one stitch more which will help to avoid a hole. Do the same for with the last stitches of that row.
Now hold both needles together and do a kitchener stitch (grafting). Weave in ends.

Differences for the 2nd Mitt
The second mitt must be knitted differently to mke it mirror inverted to the first. Here are the instructions for the 2nd mitt.
Knit the thumb part as for the 1st mitt.
Body
The basic difference is that for the neutral rows, WS and RS are switched, i.e. for mitt no. 1 your first comple body row is a WS row, while for the 2nd mitt, it's an RS row. This also means that the short rows (to widen the shaft) are knitted on the WS.
The basic difference is that for the neutral rows, WS and RS are switched, i.e. for mitt no. 1 your first comple body row is a WS row, while for the 2nd mitt, it's an RS row. This also means that the short rows (to widen the shaft) are knitted on the WS.
Row 0 (WS): do a provisional CO of 15 new stitches on a third needle and knit these stitches using your working yarn.
Row 1 (RS): k allRow 2 (WS): k5, p to last 5 sts, k5
Row 3: (RS): k all
Row 4 (WS): k5, p to to last 5 sts, k5
Row 5 (RS): k15 w+t, k to end
Repeat rows 3 and 4 twice more
Then knit the stacked stiches sequence.
Continue knitting the same number of neutrals rows (including the same number of short rows) as for your first mitt.
Then move the thumb stitches from your scrap yarn to the 2nd needle as well as the stitches from the provisional CO (don't forget to pick up stitches around the thumb to avoid holes) and graft both sides together.

This post was featured at the Knitting Love Link Party #16 and at the Fiber Tuesday Linkparty #99. Thank you!

What an interesting pattern, so very unique!
AntwortenLöschenThanks. Glad you like it.
Löschen